A great advantage of AS3 is the possibility to use external ActionScript Files for your projects. So there is no need to use confusing timeline code anymore. Except for very small projects for demonstration purpose or something like that.
This tutorial is going to show how you can connect a MovieClip with external ActionScript 3 Code.
Step 1
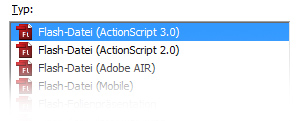
First of all we have to create a normal Flash File (FLA) with ActionScript 3. Some knowledge in object oriented-programming is assumed.

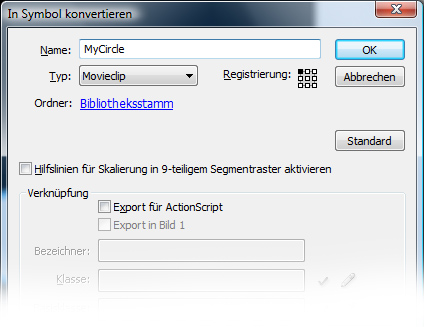
Then we draw a graphical object. For example a simple circle. Afterwards our little artwork has to be converted into a MovieClip-Symbol. You can do this by selecting it and pressing F8 or right-click to open the context menu and choose the according entry.
Now you should see a dialog window looking like the one in the picture below. Name it “MyCircle” and click “OK”.

Step 2
Ok, now we jump right into the coding. In the following step we create a AS3 File. I prefer FlashDevelop for any ActionScript development, but the Adobe Flash IDE will do it for this tutorial.
Ok let’s create a new AS3 file. Click “File” -> “New …” and choose ActionScript file. Then you fill the blank space with the following lines:
package

{

import flash.display.MovieClip;

import flash.events.*;
public class MyCircle extends MovieClip
{
public function MyCircle():void
{
addEventListener(Event.ENTER_FRAME, enterFrameHandler);
}
private function enterFrameHandler(e:Event):void
{
this.x+= 2;
this.y=Math.sin(this.x/50)*40+150;
this.x=(this.x>stage.stageWidth) ?-this.width :this.x;
}
}
}
Code explanation:
- We import all needed packages.
- For our circle being a MovieClip we have to extend the according class.
- Within the constructor we add an EventListener to the circle which is triggered every frame and calls the passed method “enterFrameHandler”. So this is like the heartbeat of our class. The triggering frequency depends on the frame rate of the FLA file (with 30 fps this is triggered 30 times per second).
- To make our circle-instances move a bit we change the X and Y position every time the method is called.
Step 3
Now that we have created our graphical object and written the code for it, we can finally connect each other.
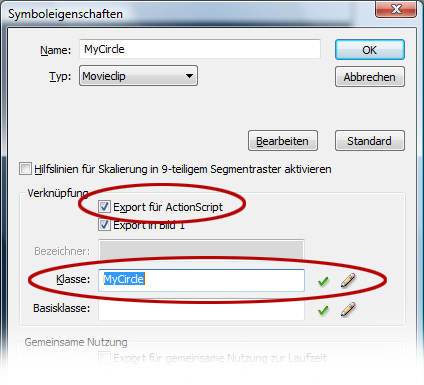
To do this we have to open our FLA file again and open the library. If it’s not open press CTRL+L. Now right-click our Circle-Symbol and choose “Properties…”. Then check “Export for ActionScript”. Then we enter the name of our external AS3 class. In our case it’s “MyCircle”.
That’s it. Press “OK”. Place your circle where ever you want on the stage and tell Flash to start your work (CTRL+ENTER). The circle should now move from left to right while moving up and down.
Drag some more instances of our circle from the library to the stage and play around with the AS3 code, if you like to.
Connect your FLA file with an external ActionScript class
You can also connect your FLA file with external class files. It works nearly the same way we did for the movieclip symbols.
Create a new AS file and enter the following code:
package

{

import flash.display.MovieClip;
public class MyFlashFile extends MovieClip
{
public function MyFlashFile():void
{
for (var i:uint = 0; i < 10; i++)
{
var c:MyCircle = new MyCircle();
c.scaleX = c.scaleY = 0.5;
c.x = c.width * i;
addChild(c);
}
}
}
}
Code explanation:
- We iterate the follwing steps 10 times, for we want to create 10 instances of the MyCircle class
- Scale every instance by 50%
- Positioning on the X-axis
- Adding the new circle to the displaylist to make it visible
Now grab your FLA file once more and open the properties of your FLA file. If you’re using Flash CS3 there is a input field named “document class”. If you’re working with Flash CS4 the field is named “class”. Now enter the name of your AS file. In case of the example above it’s “MyFlashFile”.
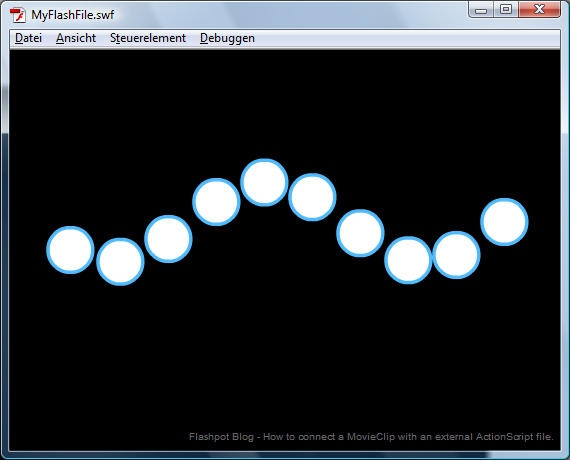
If you still have a copy of your circle on the stage remove it. Then start your flash application.
It should look something like this:
—
Downloads: Source files


very helpful and well done. thanks
thank you! 🙂
thank you !